
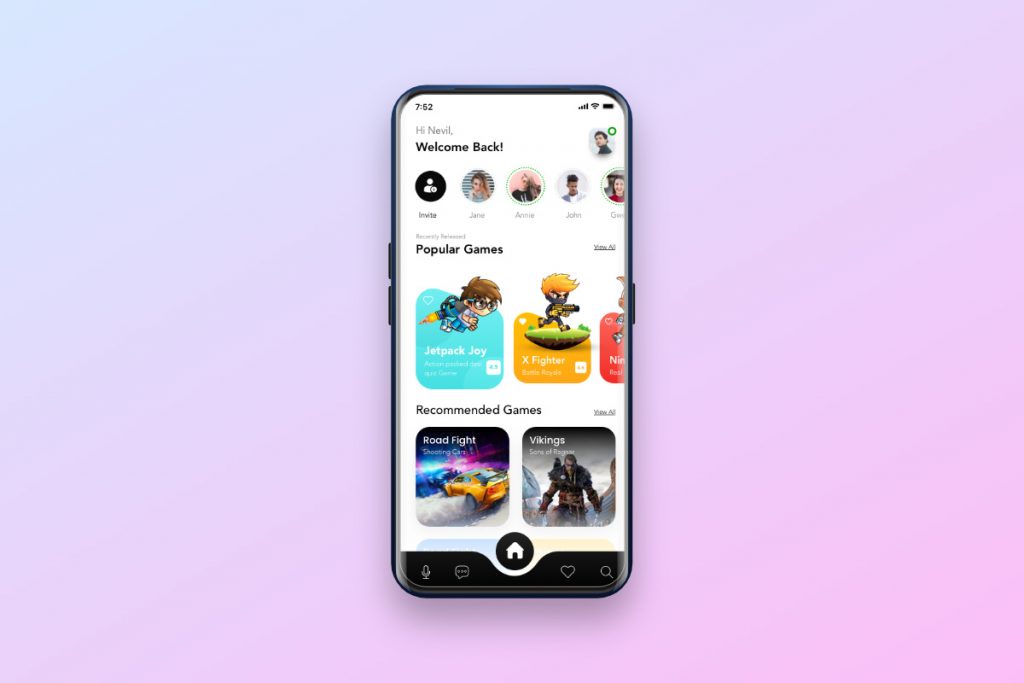
Hi, this is our second UI challenge. We are going to implement the Gaming App Design by Nevil Suresh from the Uplabs.
As we said in the previous post, there is a rule that you should split a big problem into some small subproblems and fix them one by one. Then combine them as a solution to your problem. We apply this rule in our approach (you can apply it in other parts of your life).
In each design, there are some challenging parts (and for sure some non-challenging parts). First of all, we need to recognize the most challenging parts. Then we start to think about them to find a solution. At last, we start coding. You may plan your solution on a paper, or any other method you feel comfortable with.
When we apply this rule, we will find the challenging parts as some small problems.
Let’s start with the bottom navigation. As it is a little complicated, I split it up into two parts. In this part, we focus on implementing the BottomSheet section.
1. Background Shape
Let’s start by painting the background shape:

As you know, we must use Path to draw it. the Blue sections are some simple lines. But the green section is a little challenging, let’s focus on that.
Before implementing, we need to know how Path.cubicTo(x1, y1, x2, y2, x3, y3) works.
It draws a curved line from the path’s latest position to (x3, y3) using control point 1 (x1, y1) and control point 2 (x2, y2).
Check the sample below:
@override
  void paint(Canvas canvas, Size size) {
    Path p = new Path();

    final startPoint = Offset(0, size.height / 2);
    p.moveTo(startPoint.dx, startPoint.dy);

    final targetPoint = Offset(size.width, size.height / 2);
    p.cubicTo(
      controlPoint1.dx,
      controlPoint1.dy,
      controlPoint2.dx,
      controlPoint2.dy,
      targetPoint.dx,
      targetPoint.dy,
    );

    canvas.drawPath(p, linePaint);
  }
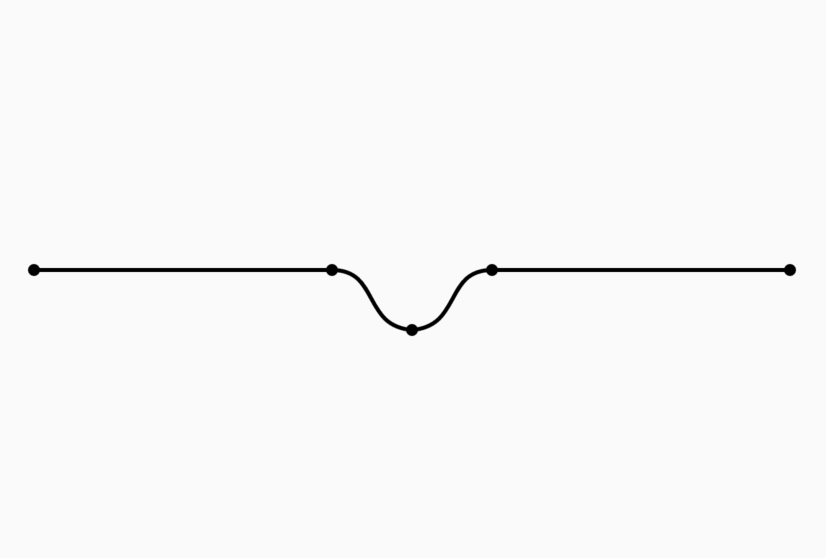
We can achieve our design, by combining two curves (using path.cubicTo), like the below image:

@override
  void paint(Canvas canvas, Size size) {
    final double holeWidth = 80;
    final double holeWidthHalf = holeWidth / 2;
    final double holeHeight = 30;
    final double targetXPercent = 0.5;

    Path p = new Path();

    final targetX = size.width * targetXPercent;

    final point0 = Offset(0, 0);
    p.moveTo(point0.dx, point0.dy);

    final point1 = Offset(targetX - holeWidthHalf, 0);
    p.lineTo(point1.dx, point1.dy);

    final point2 = Offset(targetX, holeHeight);

    final controlPoint1 = Offset(point1.dx + 24, 0);
    final controlPoint2 = Offset(point1.dx + 15, 28);

    p.cubicTo(
      controlPoint1.dx,
      controlPoint1.dy,
      controlPoint2.dx,
      controlPoint2.dy,
      point2.dx,
      point2.dy,
    );

    canvas.drawPath(
        p,
        Paint()
          ..color = Colors.black
          ..style = PaintingStyle.stroke
          ..strokeWidth = 2);
  }
As you see, we used the cubicTo function to draw the curved section. I have simply set controlPoint1, and controlPoint2 values. But you can tweak them to achieve a better result.
Now let’s implement the right section (we mirror the left section).
@override
  void paint(Canvas canvas, Size size) {
    double holeWidth = 80;
    double holeWidthHalf = holeWidth / 2;
    double holeHeight = 30;
    double targetXPercent = 0.5;

    Path p = new Path();

    final targetX = size.width * targetXPercent;

    final point0 = Offset(0, 0);
    p.moveTo(point0.dx, point0.dy);

    final point1 = Offset(targetX - holeWidthHalf, 0);
    p.lineTo(point1.dx, point1.dy);

    final point2 = Offset(targetX, holeHeight);

    final controlPoint1 = Offset(point1.dx + 24, 0);
    final controlPoint2 = Offset(point1.dx + 15, 28);

    p.cubicTo(
      controlPoint1.dx,
      controlPoint1.dy,
      controlPoint2.dx,
      controlPoint2.dy,
      point2.dx,
      point2.dy,
    );

    final point3 = Offset(targetX + holeWidthHalf, 0);
    final controlPoint3 = Offset(point3.dx - 15, 28);
    final controlPoint4 = Offset(point3.dx - 24, 0);

    p.cubicTo(
      controlPoint3.dx,
      controlPoint3.dy,
      controlPoint4.dx,
      controlPoint4.dy,
      point3.dx,
      point3.dy,
    );

    final point4 = Offset(size.width, 0);
    p.lineTo(point4.dx, point4.dy);

    canvas.drawPath(
      p,
      Paint()
        ..color = Colors.black
        ..style = PaintingStyle.stroke
        ..strokeWidth = 2);
  }
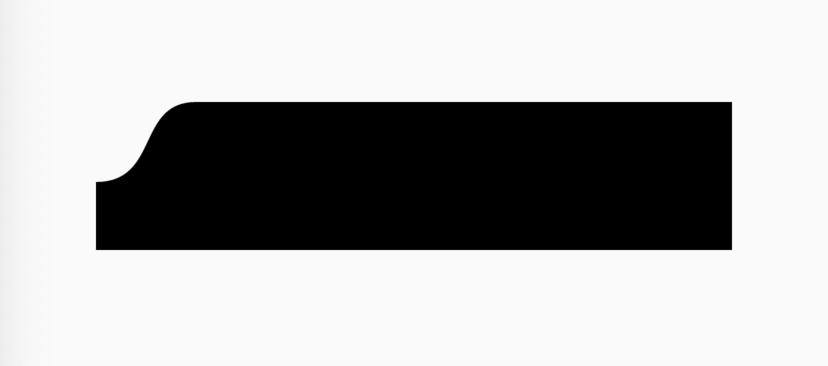
Okay, now we can wrap it up by drawing remaining lines as below:
@override
  void paint(Canvas canvas, Size size) {

    double holeWidth = 100;
    double holeWidthHalf = holeWidth / 2;
    double holeHeight = 40;
    double targetXPercent = 0.5;

    Path p = new Path();

    final targetX = size.width * targetXPercent;

    p.moveTo(0, 0);

    final point1 = Offset(targetX - holeWidthHalf, 0);
    p.lineTo(point1.dx, point1.dy);

    final point2 = Offset(targetX, holeHeight);

    final controlPoint1 = Offset(point1.dx + 30, 0);
    final controlPoint2 = Offset(point1.dx + 18, 40);

    p.cubicTo(
      controlPoint1.dx,
      controlPoint1.dy,
      controlPoint2.dx,
      controlPoint2.dy,
      point2.dx,
      point2.dy,
    );

    final point3 = Offset(targetX + holeWidthHalf, 0);
    final controlPoint3 = Offset(point3.dx - 18, 40);
    final controlPoint4 = Offset(point3.dx - 30, 0);

    p.cubicTo(
      controlPoint3.dx,
      controlPoint3.dy,
      controlPoint4.dx,
      controlPoint4.dy,
      point3.dx,
      point3.dy,
    );

    p.lineTo(size.width, 0);
    p.lineTo(size.width, size.height);
    p.lineTo(0, size.height);
    p.lineTo(0, 0);

    canvas.drawPath(
      p,
      Paint()
        ..color = Colors.black
        ..style = PaintingStyle.fill
        ..strokeWidth = 2);
  }
Now we can change targetXPercent value to move the curved section or even animate it like the sample below:
But there is a problem. If we set targetXPercent 0, we get this result:
It’s time to use canvas.clipRect() method.
It cuts outside of our painting area: canvas.clipRect(Rect.fromLTWH(0, 0, size.width, size.height))
Okay, It’s time to move on to the next step.
2. Circle Background
In this step, we are going to draw a circle above our curved section. We use canvas.drawCircle() to draw it.
@override
  void paint(Canvas canvas, Size size) {
    ...
    canvas.drawCircle(
      Offset(targetX, fabSize / 2),
      fabSize / 2,
      Paint()..color = Colors.black);
  }
3. Overlaid Icons
In this step, we are going to put a Row upon our shape to lay our icons.
@override
  Widget build(BuildContext context) {
    return SizedBox(
      width: double.infinity,
      height: navHeight + fabSize / 2,
      child: Stack(
        children: [
          CustomPaint(
            painter: _MyBottomNavigationCustomPainter(0.5, fabSize, fabMargin),
            size: Size(
              double.infinity,
              navHeight + fabSize / 2,
            ),
          ),
          Align(
            alignment: Alignment.topCenter,
            child: SizedBox(
              width: fabSize,
              height: fabSize,
              child: FloatingActionButton(
                onPressed: () {},
                backgroundColor: Colors.black,
              ),
            ),
          ),
        ],
      ),
    );
  }
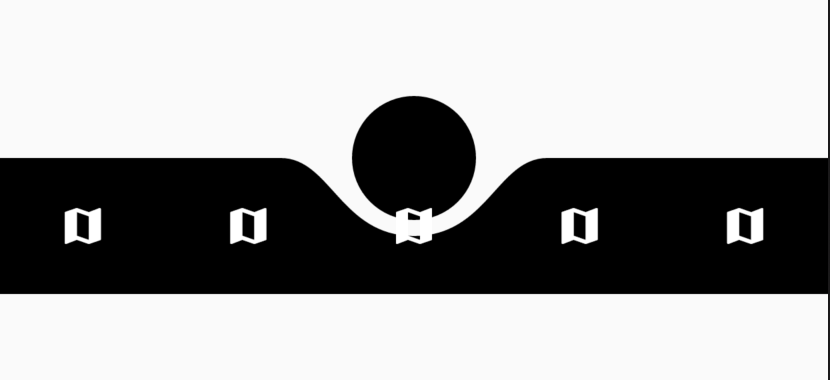
As you see there is just one problem. We should lift the selected item (at this sample middle item) up. Let’s wrap the middle icon with Transform.translate().
@override
  Widget build(BuildContext context) {
    return SizedBox(
      width: double.infinity,
      height: navHeight + fabSize / 2,
      child: Stack(
        children: [
          CustomPaint(
            painter: _MyBottomNavigationCustomPainter(0.5, fabSize, fabMargin),
            size: Size(
              double.infinity,
              navHeight + fabSize / 2,
            ),
          ),
          Align(
            alignment: Alignment.bottomCenter,
            child: Container(
              height: navHeight,
              child: Row(
                mainAxisSize: MainAxisSize.max,
                mainAxisAlignment: MainAxisAlignment.spaceAround,
                children: [
                  Icon(
                    Icons.map,
                    color: Colors.white,
                  ),
                  Icon(
                    Icons.map,
                    color: Colors.white,
                  ),
                  Transform.translate(
                    offset: Offset(0, -36),
                    child: Icon(
                      Icons.map,
                      color: Colors.white,
                    ),
                  ),
                  Icon(
                    Icons.map,
                    color: Colors.white,
                  ),
                  Icon(
                    Icons.map,
                    color: Colors.white,
                  ),
                ],
              ),
            ),
          ),
        ],
      ),
    );
  }
There you go! I think we are done with the BottomSheet challenge. We just need to make some minor changes to wrap it up.
I used ImplicitlyAnimatedWidget to implement a built-in animation for switching between selected items (Let me know if you feel we need a tutorial about the ImplicityAnimatedWidget).

In the end, because it is enough for the first version of a library and people can use it in their own projects, I decided to publish it as an individual library.
Keep in mind: You should not hesitate to publish your work. Just let it go and wait for the feedback. Feedback can show you the way. Just do it and make it public. Don’t think about how people will judge you.
This document shows you how to publish a flutter package into the pub.
CurvedBottomNavigation
Here is the CurvedBottomNavigation library. You can check it in the Github, and Pub.
Simply you can import it in your app, by adding this line in your pubspec.yaml file.
curved_bottom_navigation: ^1.0.0
Check out the 2nd part here.
[…] the first part, we have implemented the bottom sheet section. Because I think that was the most challenging […]
[…] Thanks for reading this long article. Please let me know is it annoying to read this kind of long post or not? If it is annoying I can split them into a series of blog posts. (Like what we did in UI Challenge 2). […]
Outstanding post, you have pointed out some wonderful details , I too believe this s a very excellent website.